
Navigation Tips, Hints, and Tricks
This article provides practical navigation hints and time‑saving tips to help you work more efficiently in Altus.
These tips apply across the main areas of the platform and are suitable for all users, depending on permissions.
Switch between areas using Change area
Use the Change area picker in the bottom‑right corner of the app to move quickly between areas such as Initiatives, Strategy, Resources, and Settings.
How it works:
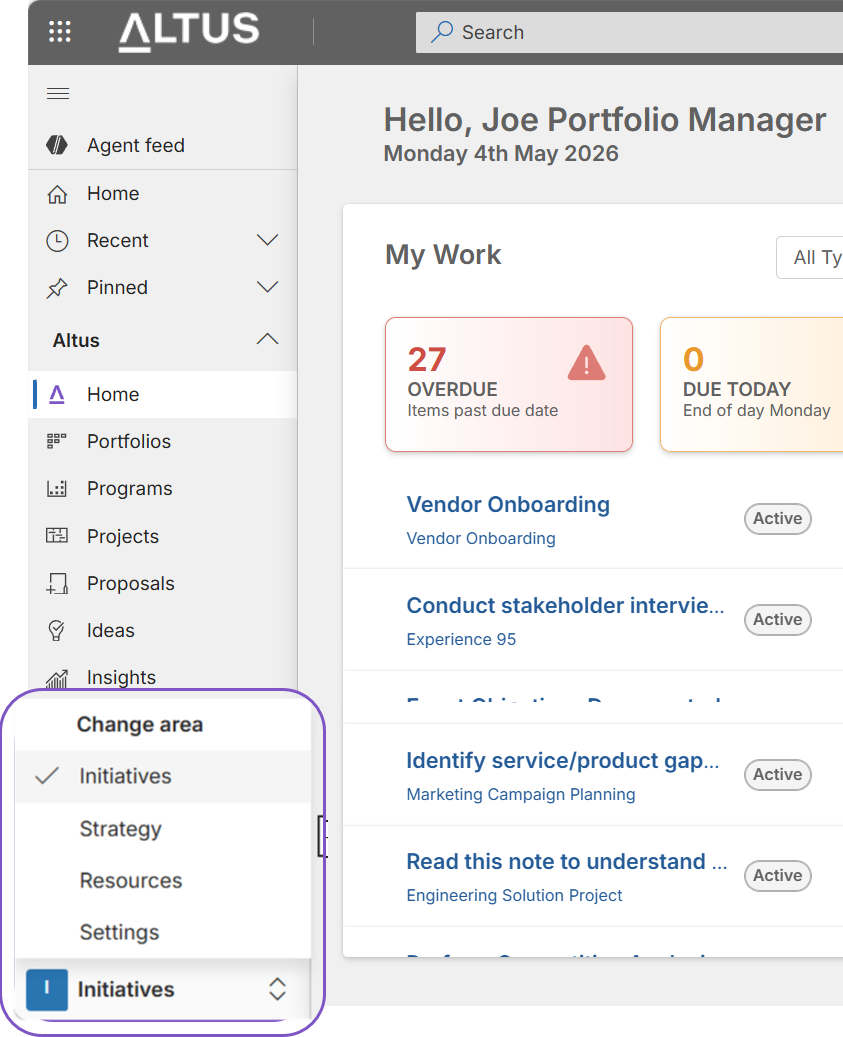
- Select the current area name in the bottom‑right corner
- Choose another available area from the list
Important: Only areas permitted by your user role will be visible.
Pin frequently used records
Pin recently opened records for quick access from anywhere in Altus.
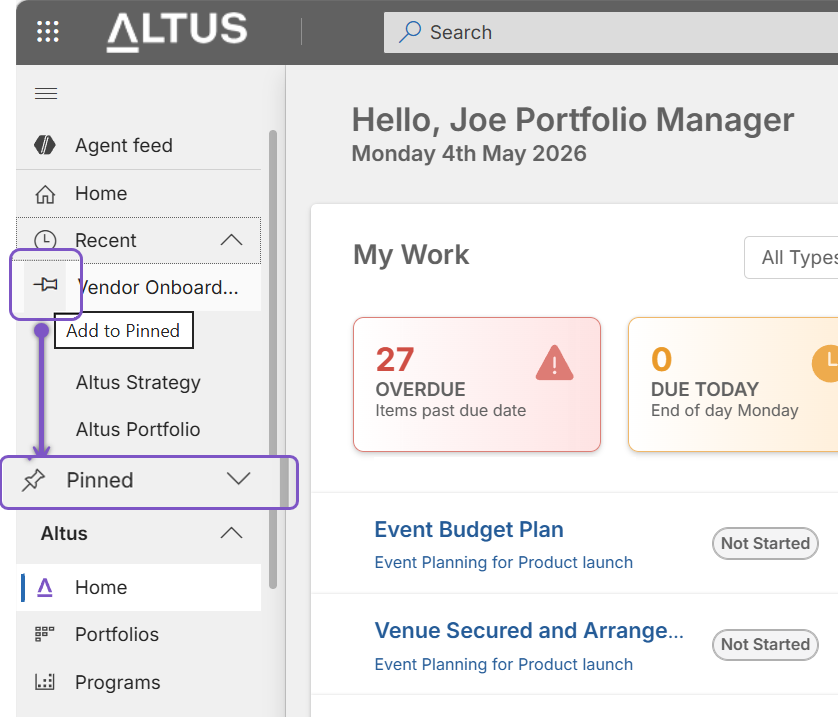
How it works:
- Open Recent from the left navigation
- Select the Add to Pinned icon infront of a record name
Tip: Pinned items appear under Pinned for easy access.
Collapse the left navigation menu
Maximise screen space by collapsing the left navigation menu when focusing on content.
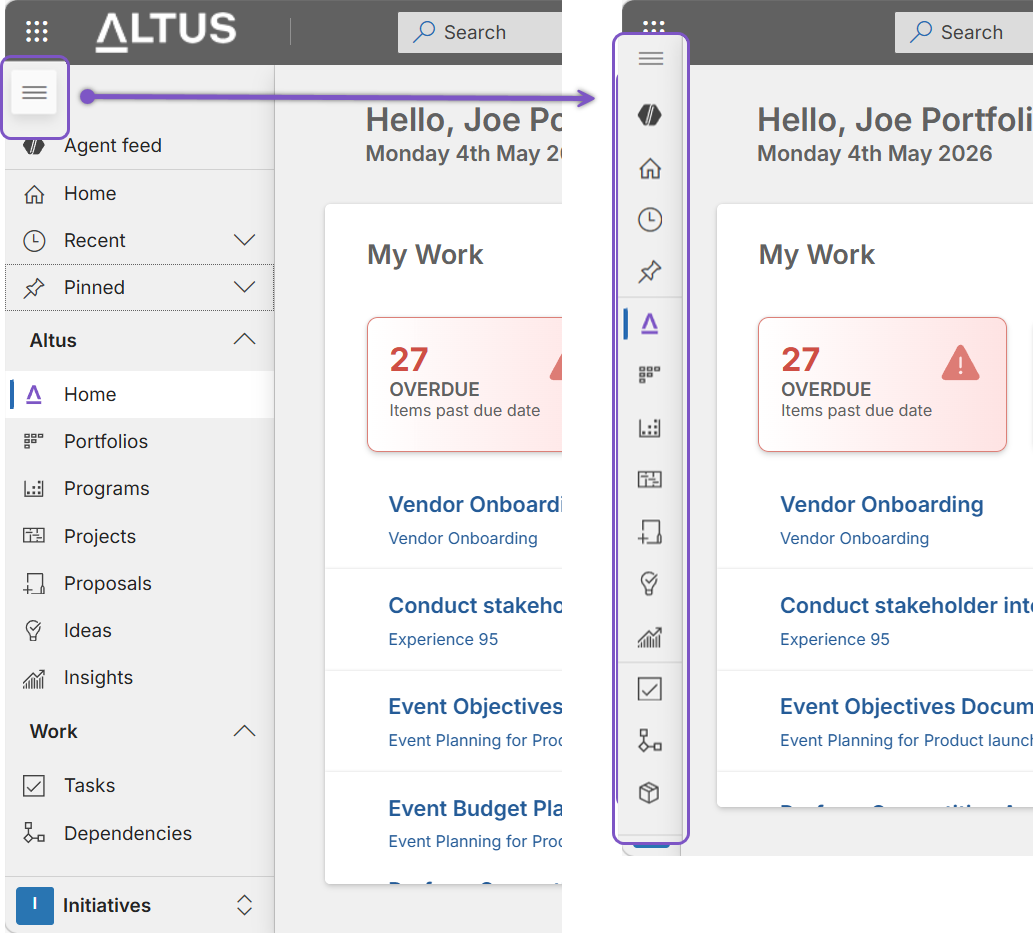
Tip: This is especially useful when working in grids, charts, or schedules.
Switch views to find information faster
System and personal views help you filter and display records in ways that suit your work.
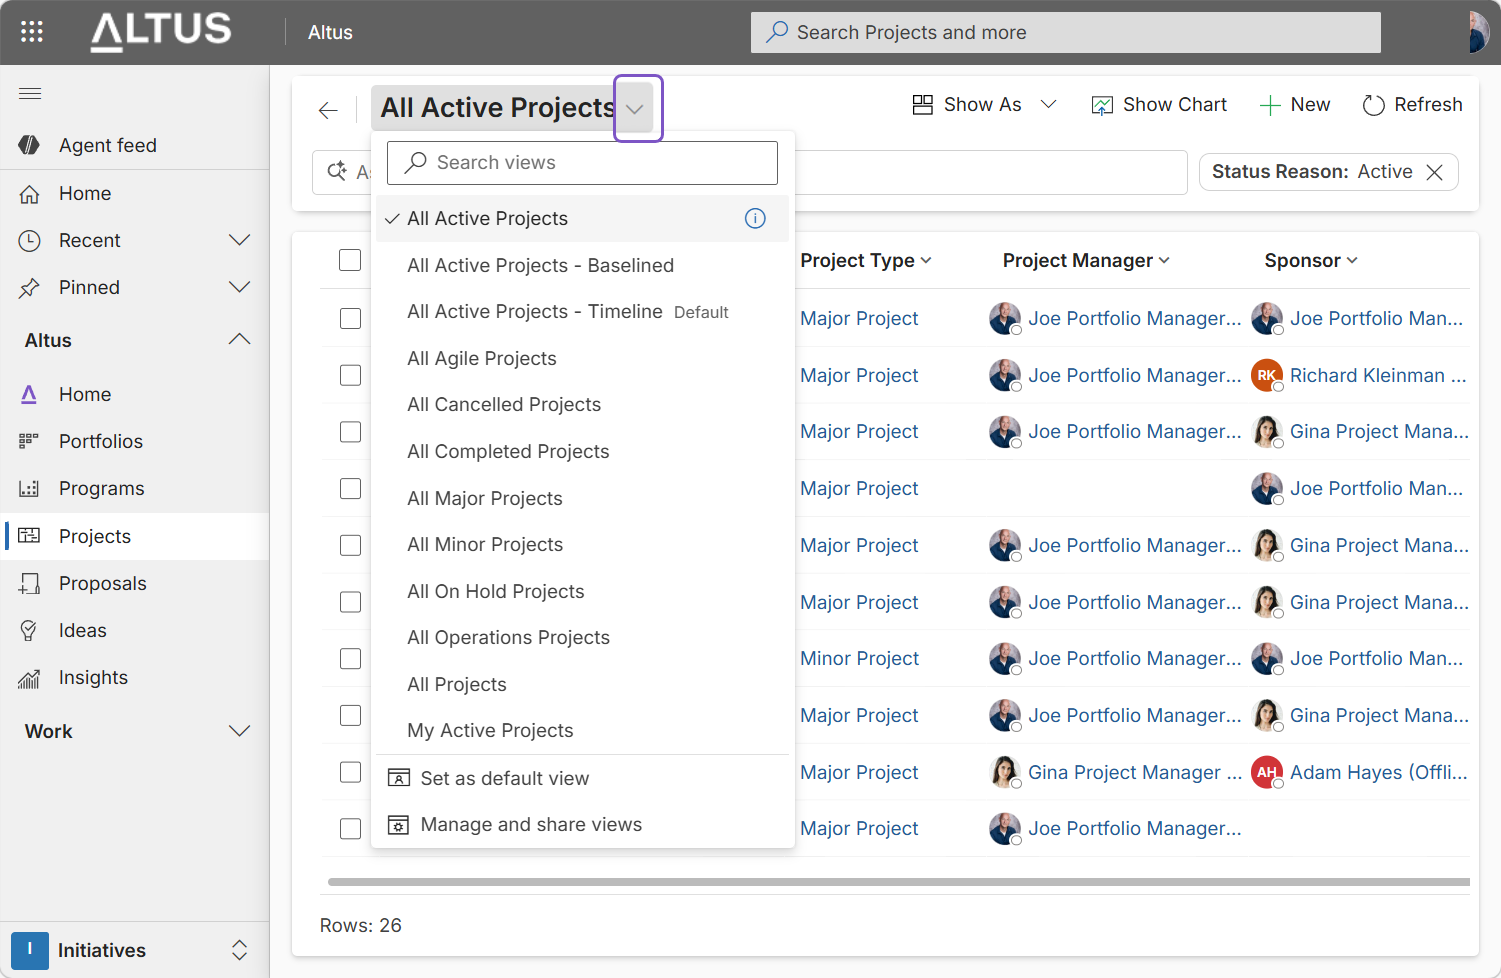
How it works:
- Select the current view name (for example, All Active Projects)
- Choose another view from the dropdown.
- Use Search views to quickly locate the view you need
Set a default view
Save time by setting a preferred view as your default.
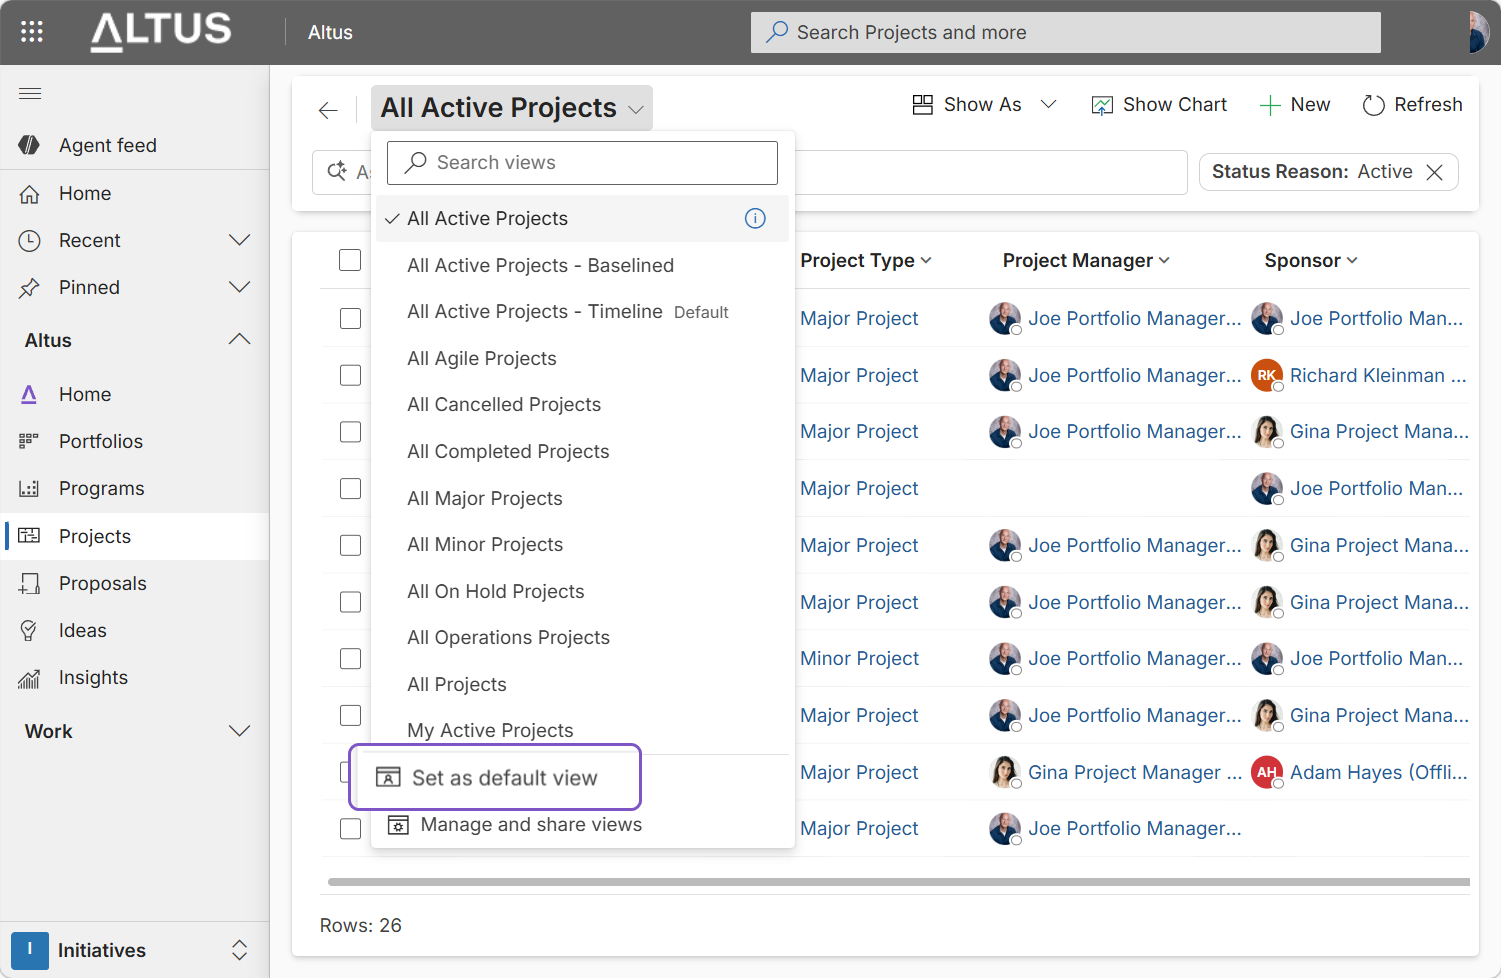
How it works:
- Open the view selector and apply a view.
- Choose Set as default view
Tip: That view will open automatically next time you return to the list.
Edit multiple records in bulk
You can update specific attributes across multiple records without opening each one.
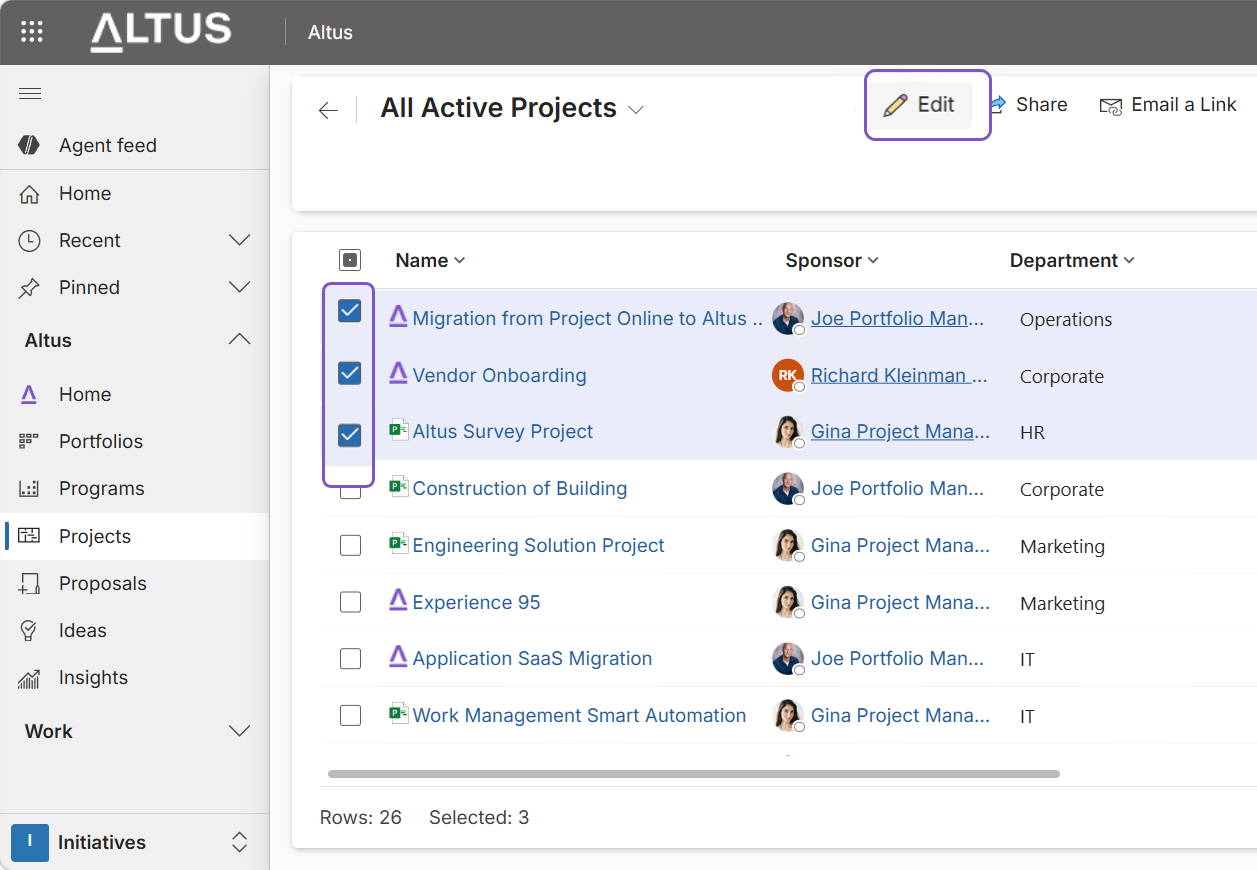
How it works:
- Select multiple records from a list.
- Choose Edit from the command bar.
- Update shared fields and save changes.
Tip: Not all record attributes can be bulk-edited using this method.
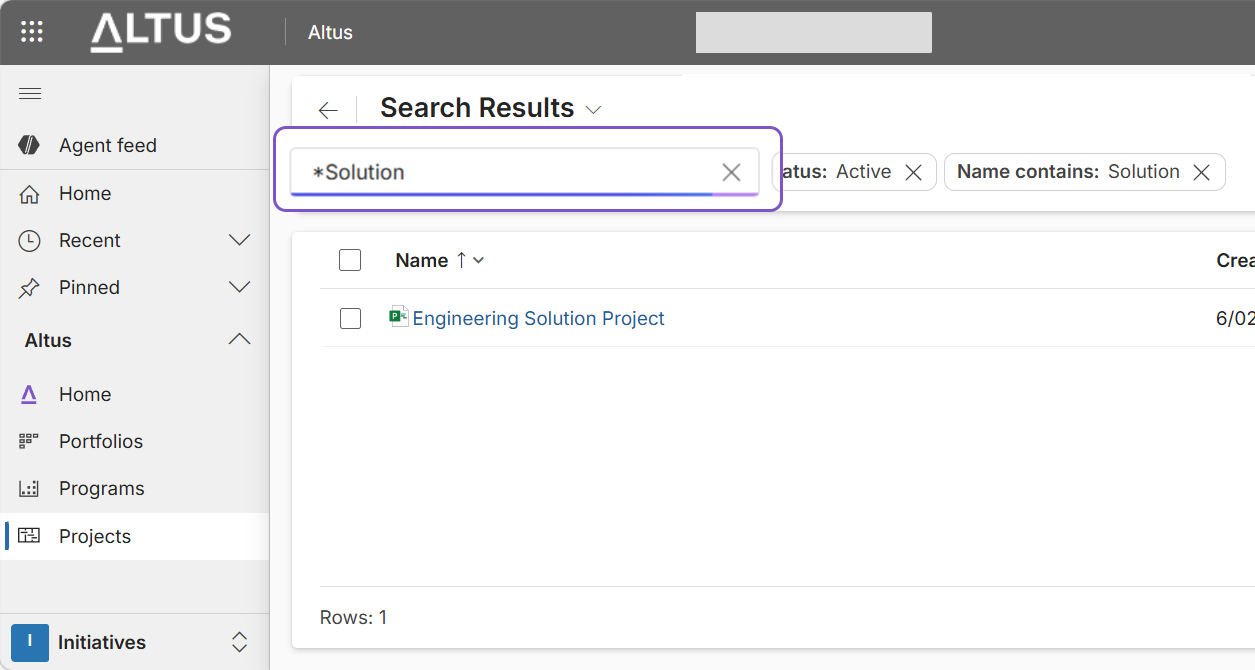
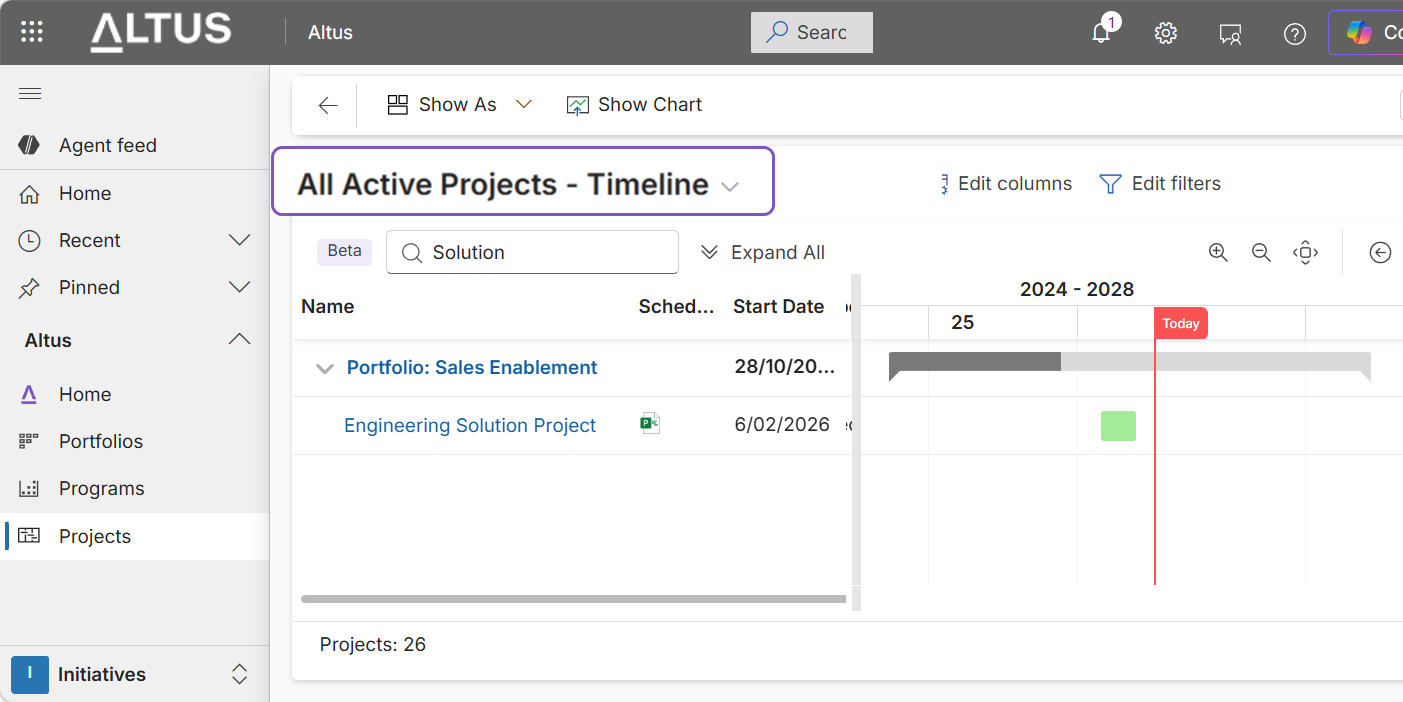
Improve list searching with wildcards
The search box matches records that start with your keyword by default. To find records where your keyword appears anywhere in the name, start your search with an asterisk: *keyword
Tip: Only when you apply the Active Projects - Timeline view within Projects, you do not need to use the * symbol when searching for keywords.
Customise list columns
Tailor lists to show only the columns that matter to you.
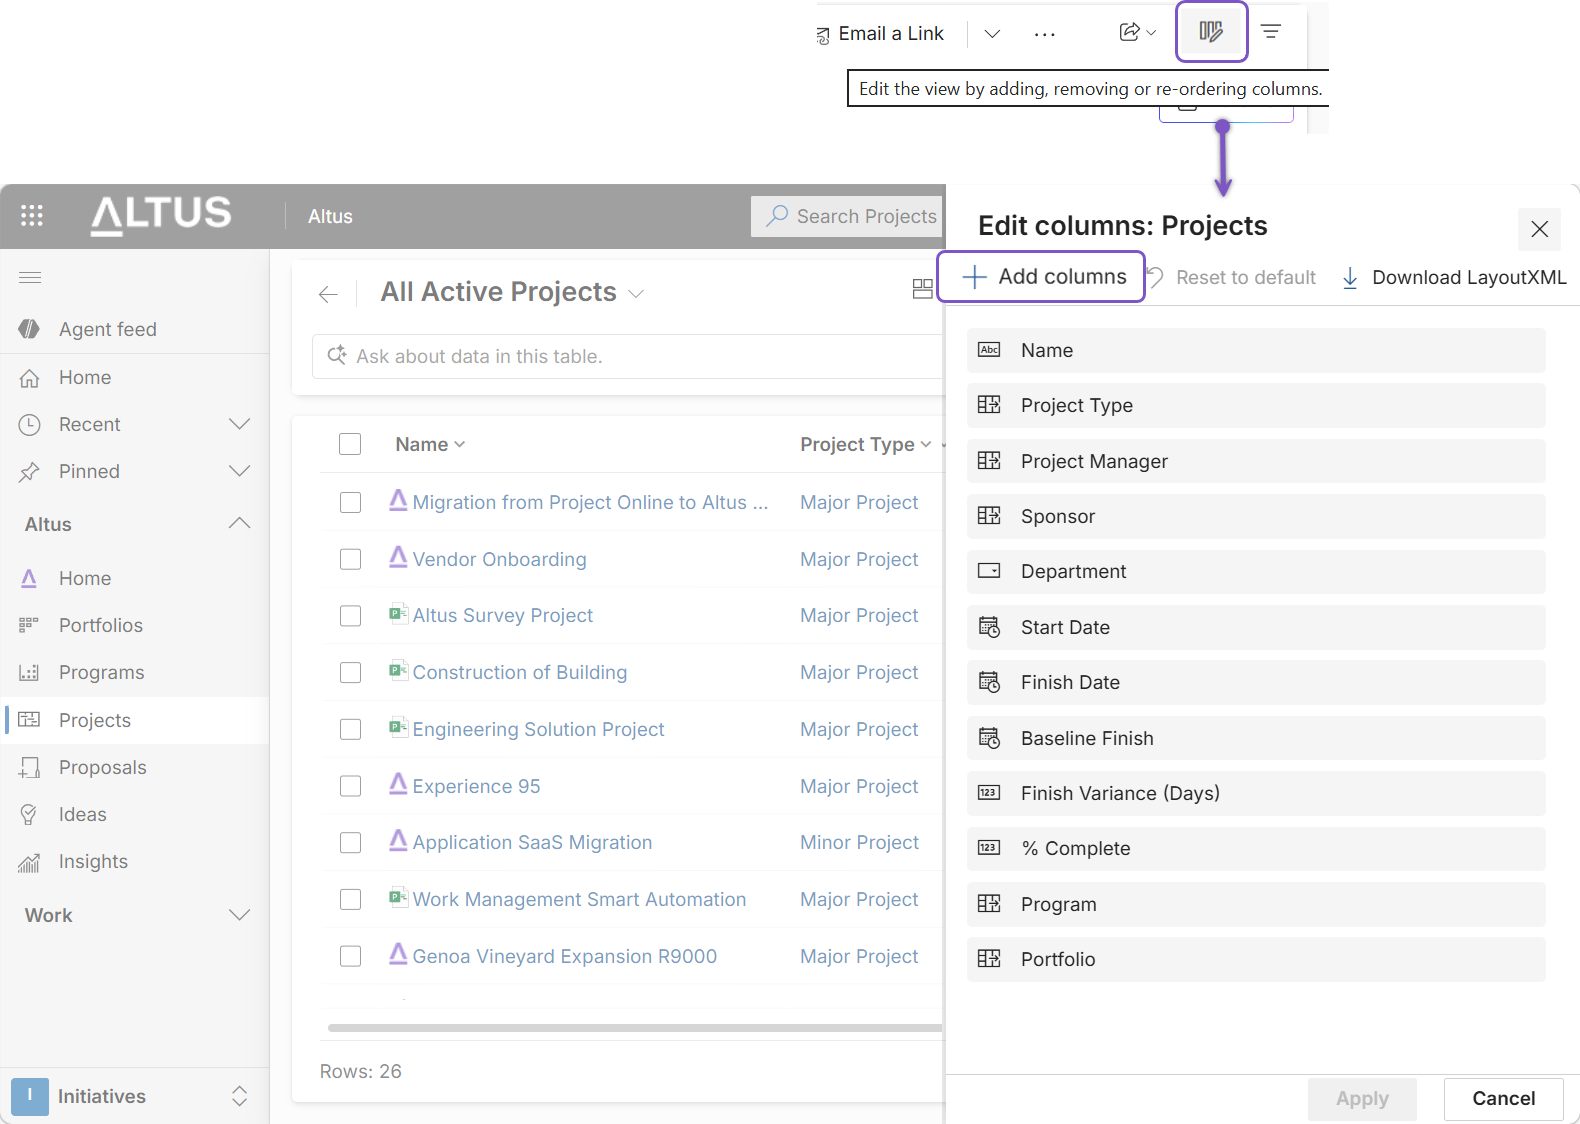
How it works:
- Select Edit columns
- Add, remove, or reorder columns
- Apply changes.
Tip: You can reset back to the system default view at any time.
Switch between list and chart views
Lists can also be visualised as charts for quick insights.
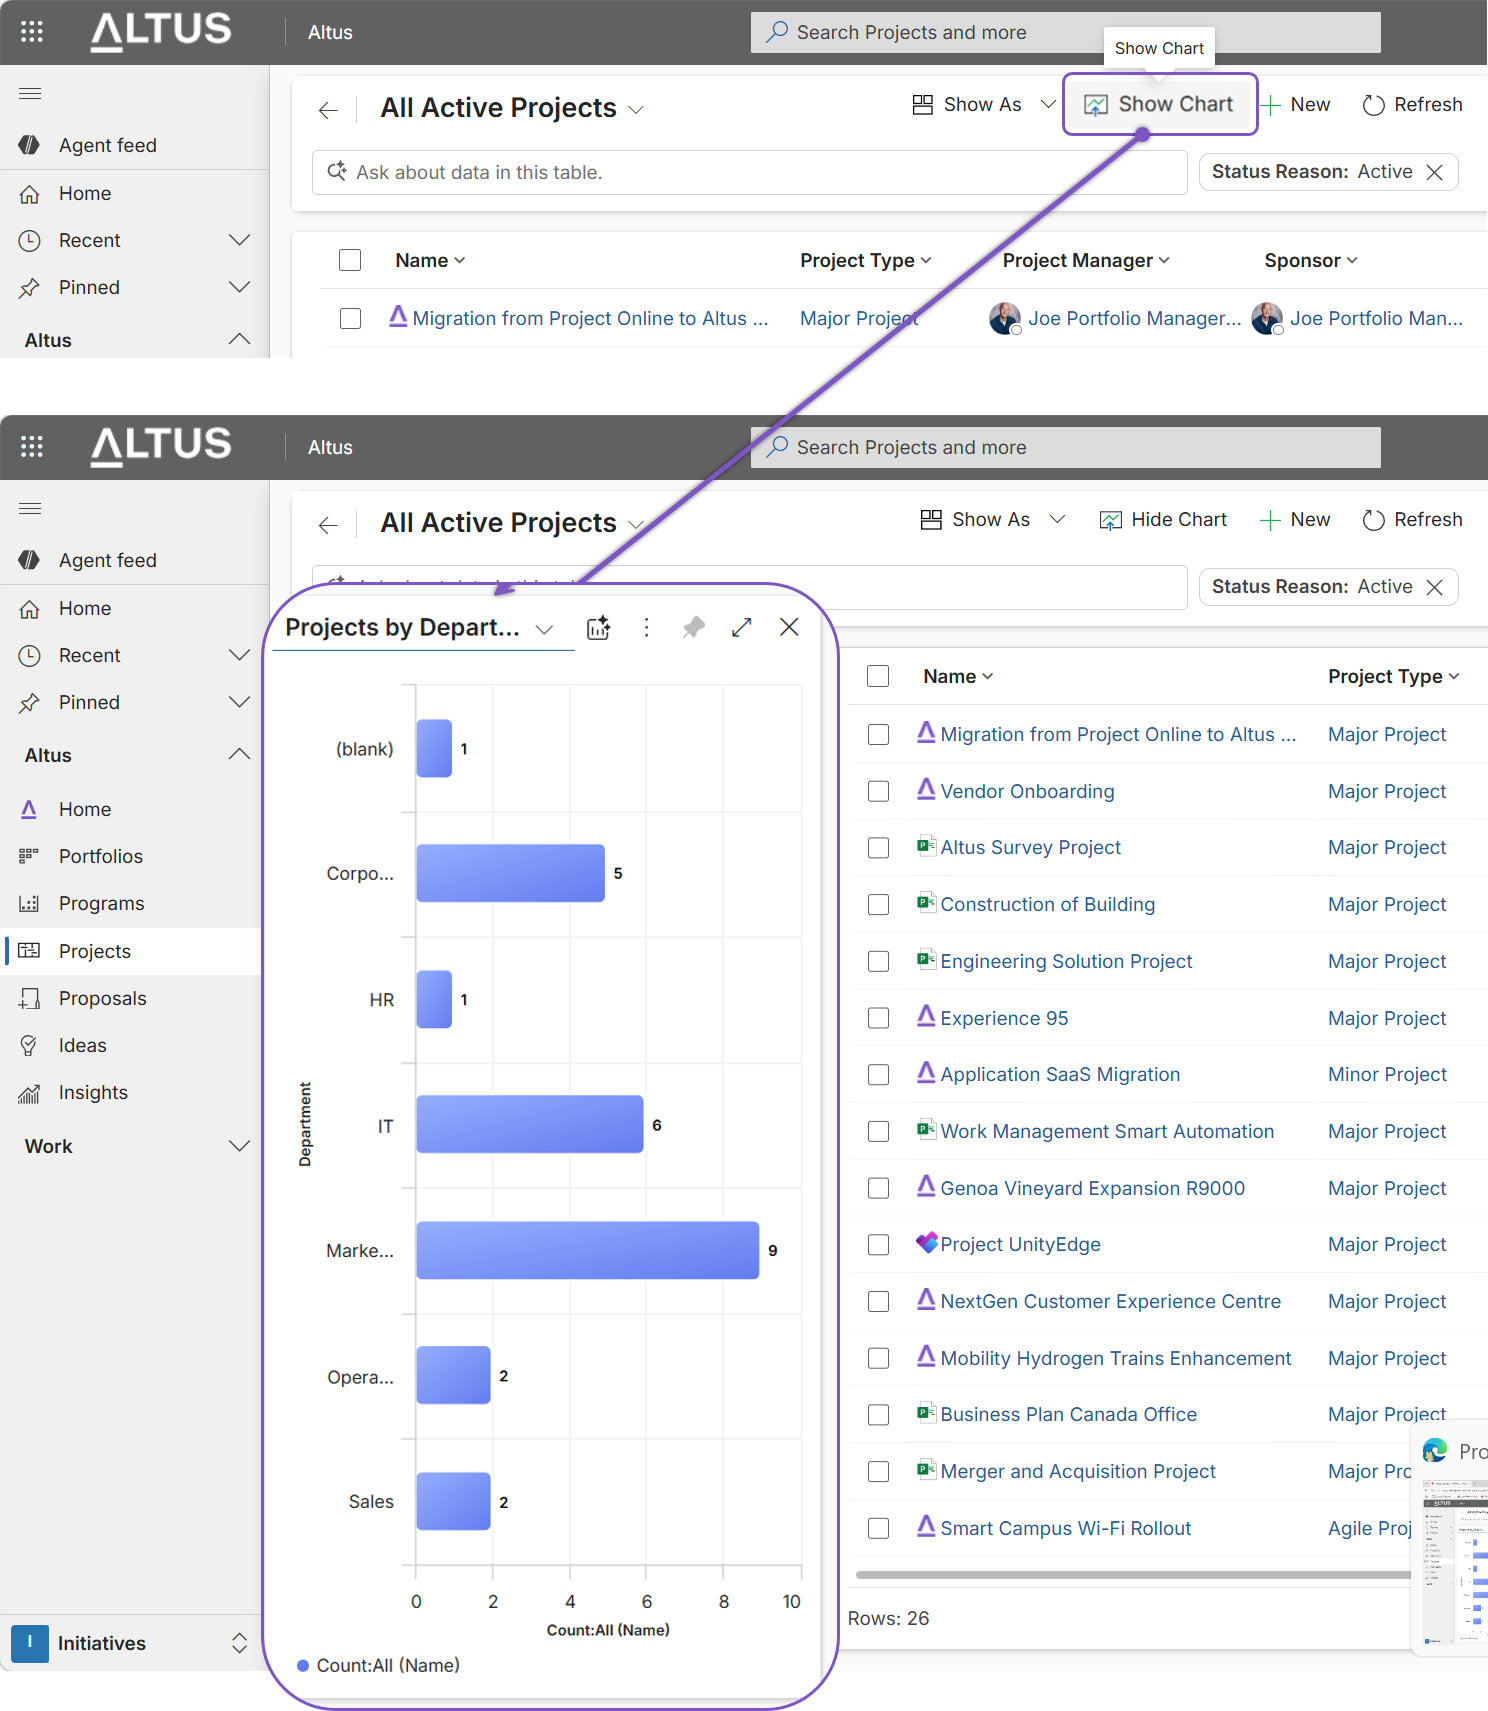
How it works.
- Select Show chart
- Choose a chart type (for example, by project type or status)
- Interact directly with the visual data
Use the record set navigator
Quickly move between records within a list without returning to the grid.
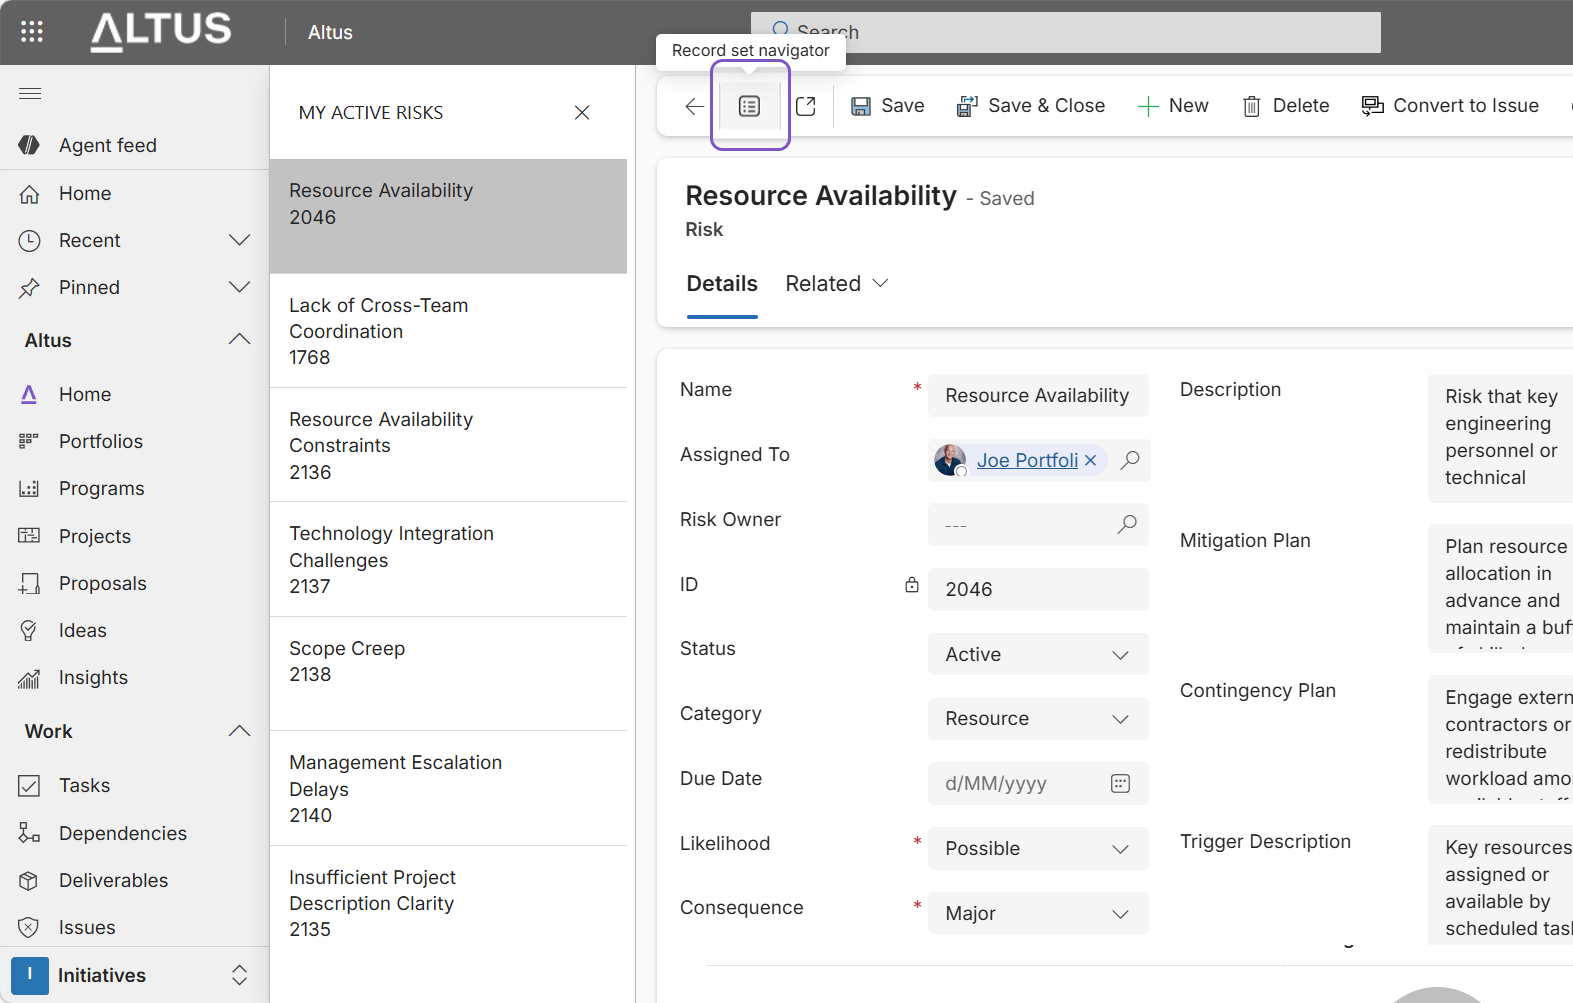
Tip: This feature applies to most lists accessed from the left navigation, except Projects.
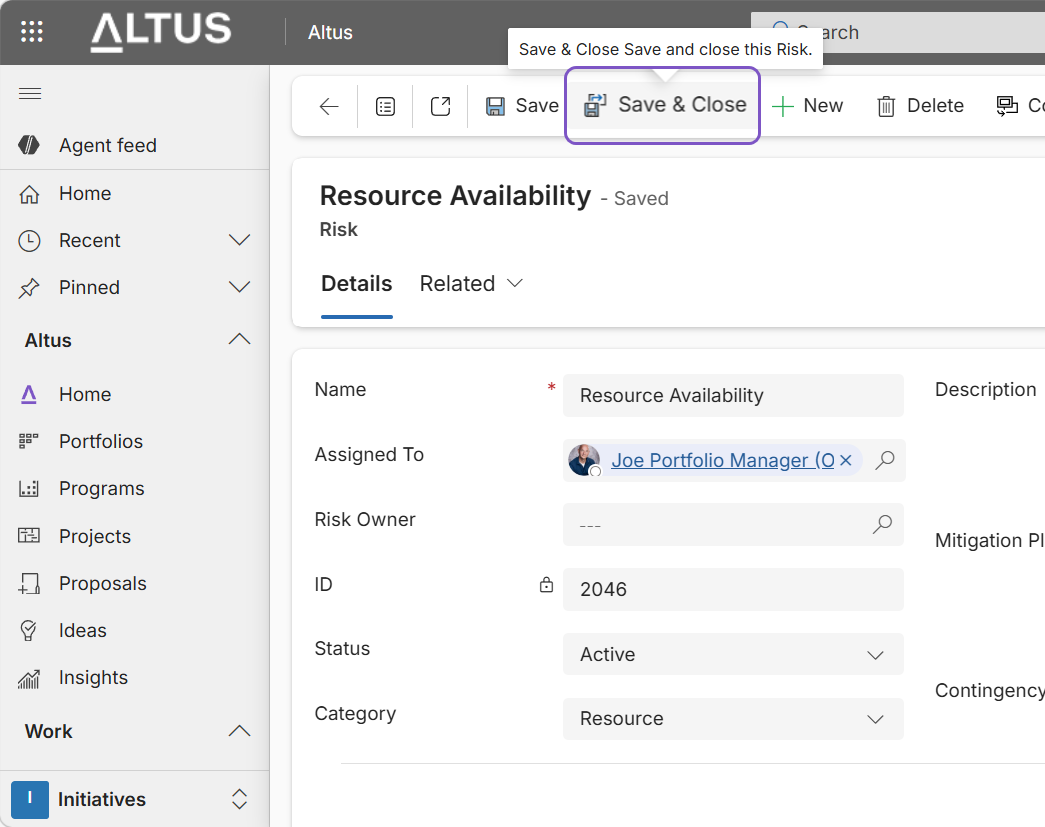
Always Save and Close
When working in registers or lists:
- Clicking + New while viewing an open record creates a new, unlinked (orphan) record so it is best practice not to create a new crecord using this method.

Tip: This can cause data to be saved outside the intended parent record.
- Always click Save and Close before creating a new item
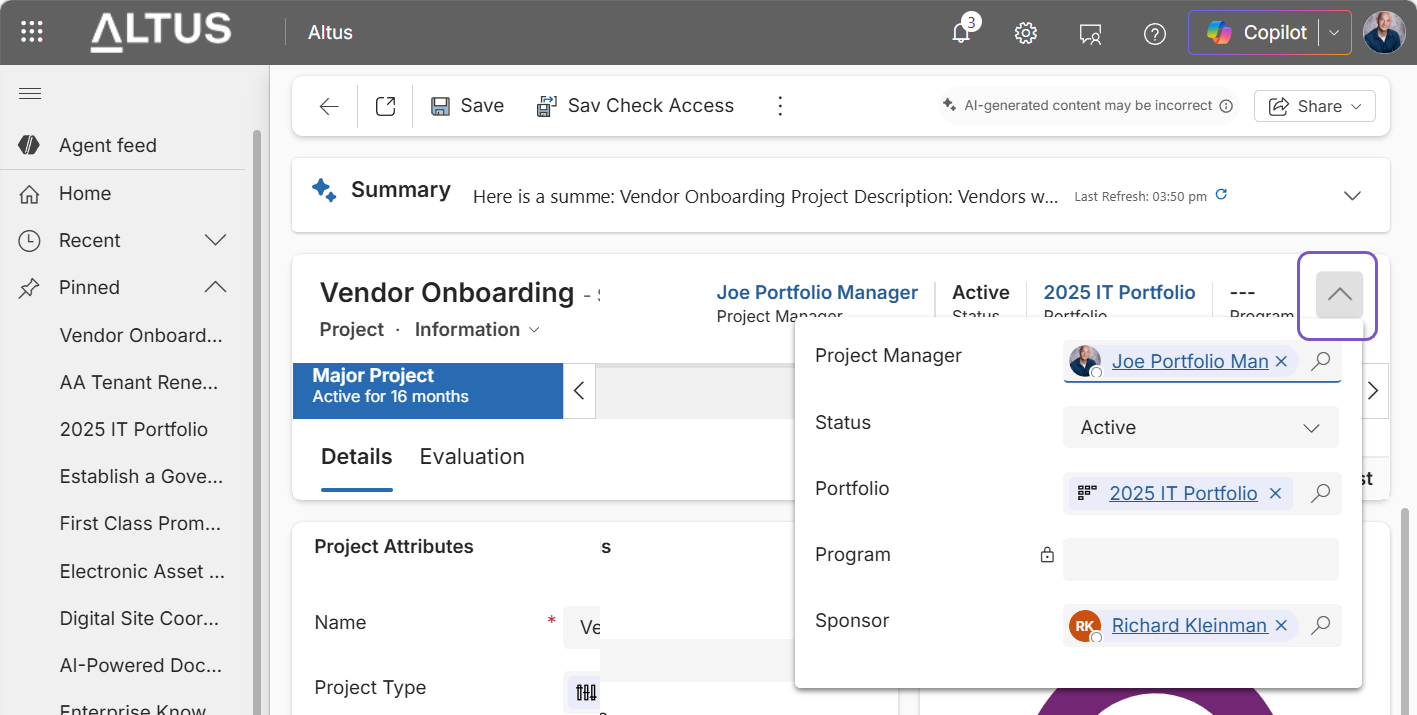
Navigate project information using tabs
Project‑related information is grouped under tabs such as Information, Tracking, Resources, and Strategy depending on your permssion.

Tip: The open‑book icon indicates that the visible tabs belong to the selected grouping. Always use the dropdown beneath the project name to move between different project sections. This allows faster updates without returning to the project list.
Show or hide the project header
Use the chevron icon in the header to expand or collapse project summary information when updating them.
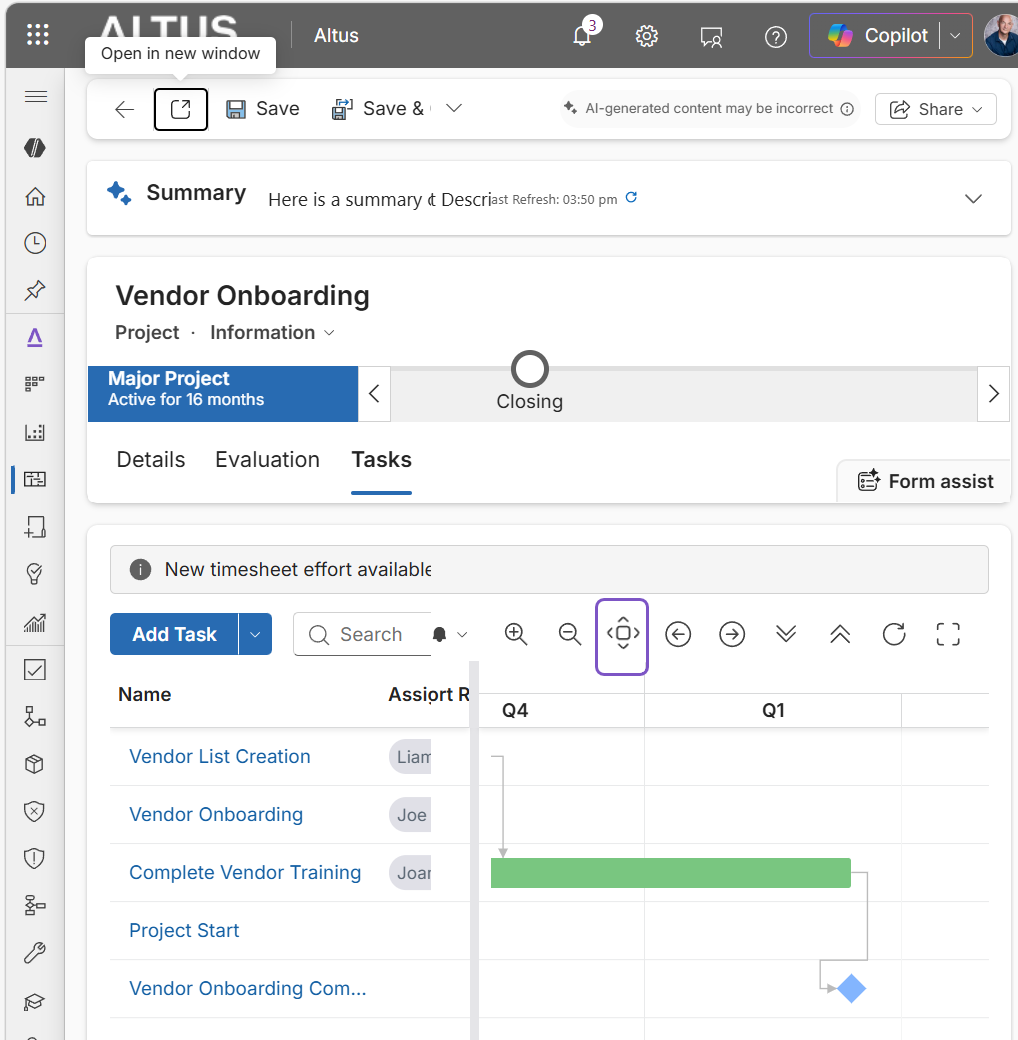
Zoom to Fit the project schedule
When viewing a schedule under the Tasks tab, use Zoom to Fit to display the full timeline in a single view.
Tip: This reduces the need for horizontal scrolling or manual zooming.
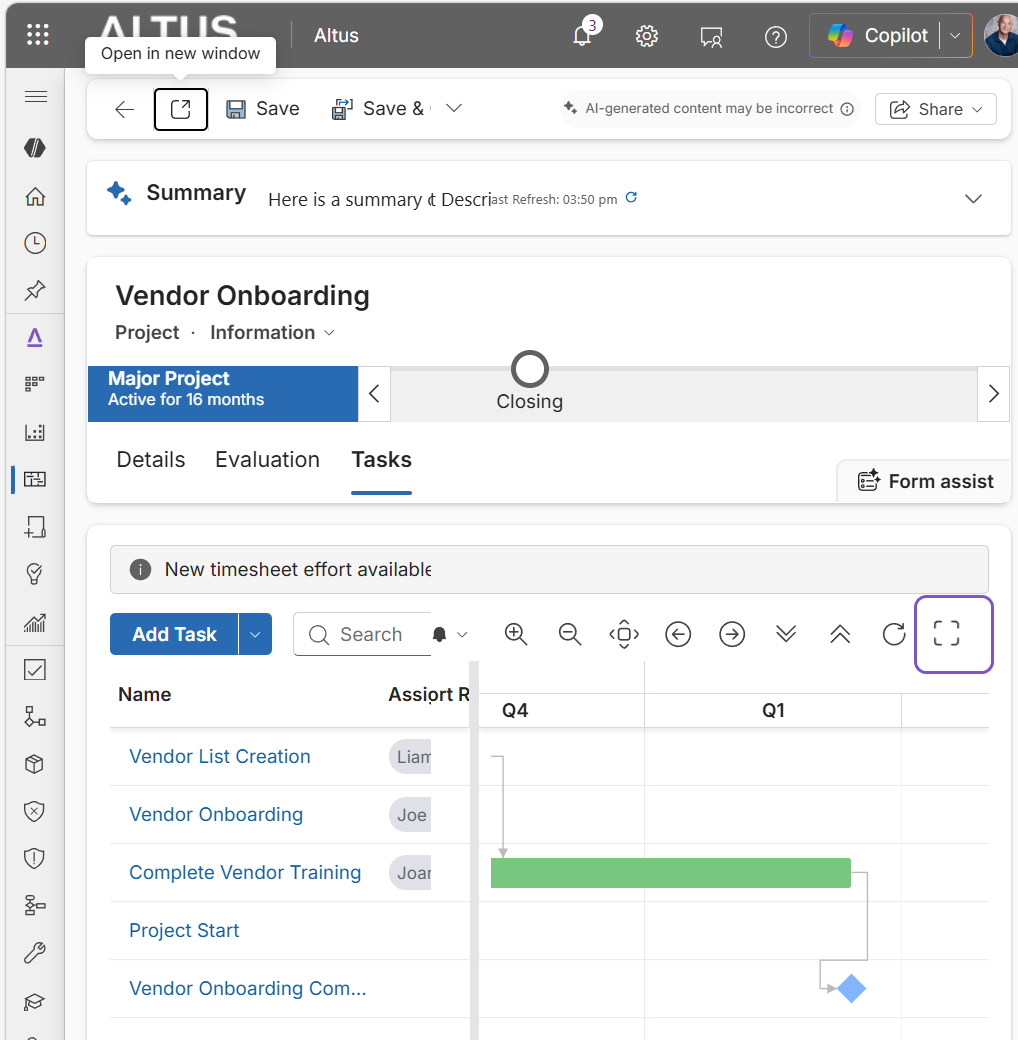
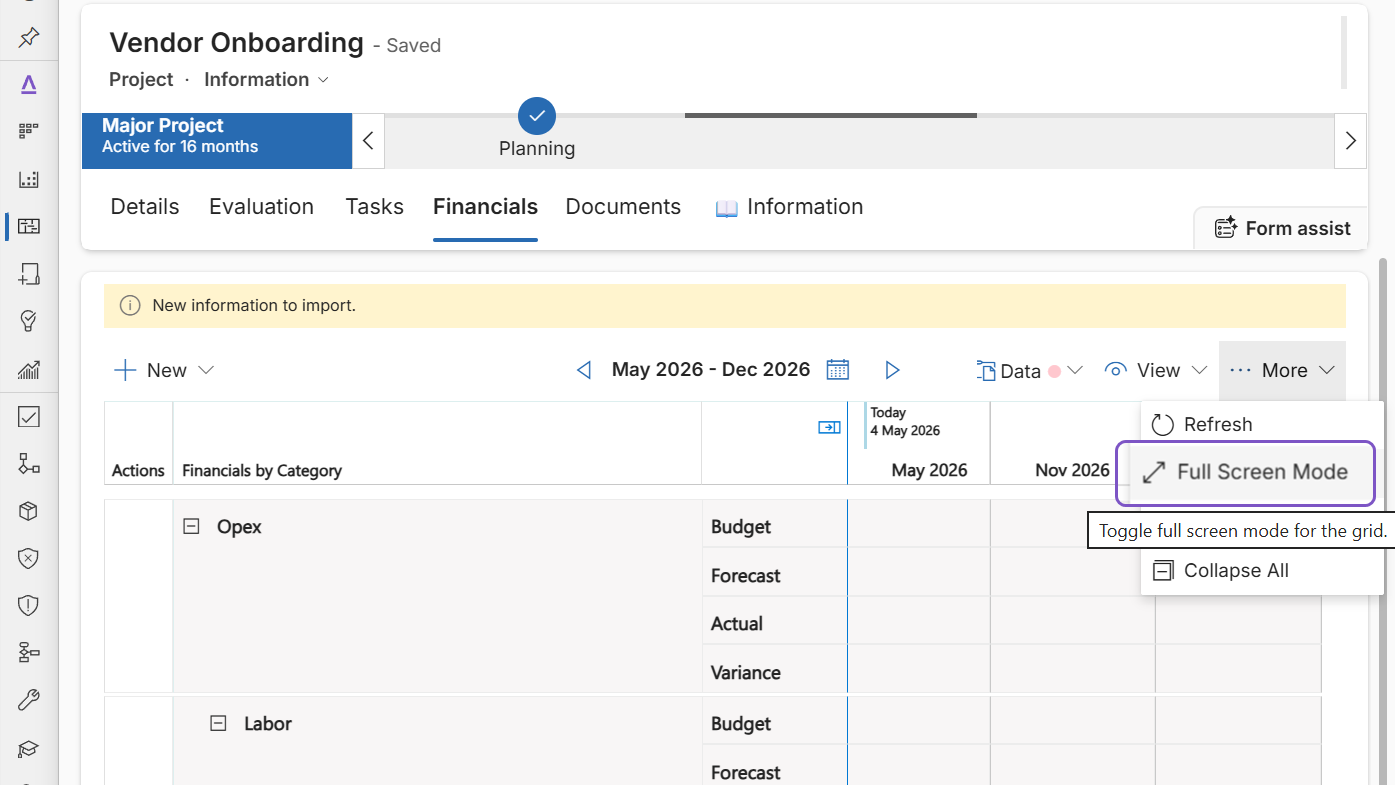
Use Full Screen mode
Toggle Full Screen to expand grids or schedules to fill the entire screen and reduce distractions.
Time‑saving tip: Quick Create
When entering data using a Quick Create form:
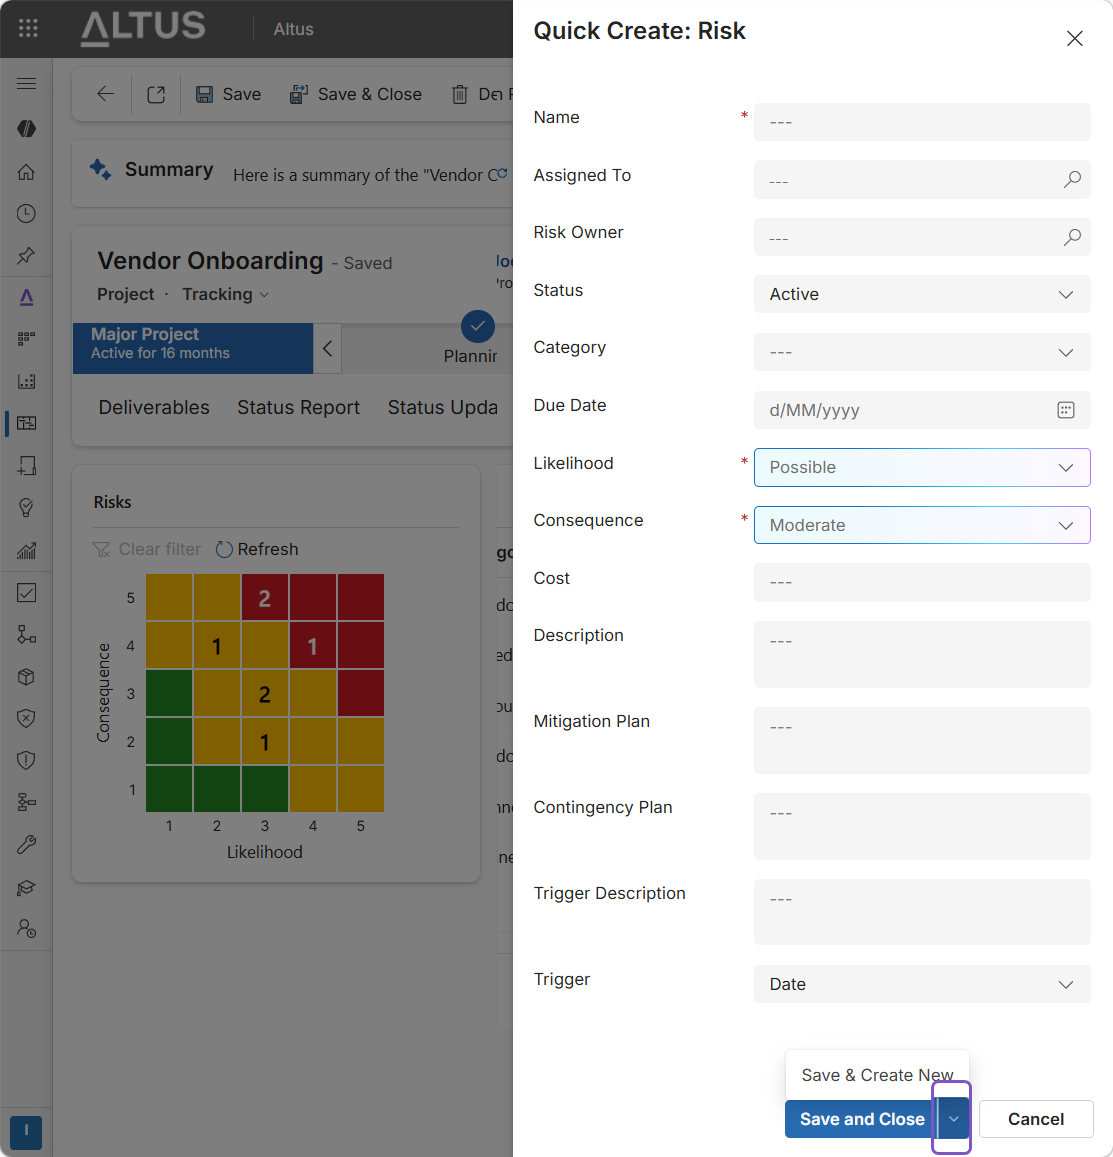
Tip:
- Use Save & Create New to add multiple items in one session
- Once finished, select Save and Close
- This avoids reopening the form repeatedly.
Notes and caveats
- Navigation options shown may vary depending on permissions and configuration
- Some visuals reflect standard Altus behaviour; customised environments may differ slightly